• About

Far Reach Voyages

~ The sailing, maintenance, and upgrades of a highly modified and custom built Cape Dory 36 sailboat. Please visit our other website that documents the six year rebuild and modification of the sailing vessel Far Reach at www.farreachvoyages.com.

Far Reach Voyages

Category Archives: Upgrades

Splicing Wire Standing Rigging in British Columbia

23 Sunday Sep 2018

Posted by farreachvoyages in Boats, People, Planning, Upgrades

≈ Leave a comment

Tags

Liverpool Splice

400C2DCC-B2DF-4953-9BBB-39F044CC3F15

I spent three weeks on Vancouver Island splicing rigging and helping my friend Kaj install the rig on his self built Lyle Hess designed 34’ Falmouth Cutter.

As mentioned in an earlier post, I was invited by my friend Kaj Jakobsen, to help him  step the mast and splice the standing rigging on his beautiful Lyle Hess designed 34’ Falmouth Cutter.  I flew to Vancouver Island in the middle of July.  I had never been to British Columbia and all I can say is wow!  It is gorgeous.  It reminded me of Montana but with a lot of water.  Many islands.  Clear water.  Deep fiords.  Lovely Douglas Fir trees everywhere.  Clear sunny skies.  Perfect temps.

Continue reading →

Hand Splice Standing Rigging—The Liverpool Splice

16 Monday Jul 2018

Posted by farreachvoyages in Equipment, Maintenance, Modifications, Musings, Uncategorized, Upgrades

≈ Leave a comment

Tags

Hand spliced wire rigging


6605E4C5-9F2F-4B38-9C4F-2DE760E55F5A

All of the standing rigging on the Far Reach is spliced to include the 3/8” bob-stay and the 5/16” sprit-shroud stays.

Readers of our rebuild website may remember I hand-spliced the standing rigging for the new mast we built for the Far Reach. It was one of the many projects associated with the six year rebuild. I used a splice called the Liverpool Splice. I learned it by reading Brion Toss’ book The Rigger’s Apprentice.

Continue reading →

Upgrading Primary Winches—Phase II. And a new winch base design.

09 Wednesday May 2018

Posted by farreachvoyages in Equipment, Modifications, Uncategorized, Upgrades

≈ Leave a comment

C0E4C815-D19C-4F60-97AE-2D32DC73BCBA

Before: The primary winches were on a 2” riser pad and were, by design,  very tall winches.  They also suffered from aluminum/bronze corrosion—IMO a fundamentally bad design.

73B9015F-EDC9-46EF-B542-DB7124166749

After: The new primaries are a little shorter in height plus I removed the riser pad.  They are the same model as the smaller stays’l winches we installed last fall. Note the new winch base with bronze plate.

After completing a number of small projects this year, it was time to tackle the last big project for the foreseeable future—installing the new primary winches. The new winches are bronze Lewmar Ocean Series ST 46 two speed winches. The 46s replace the original 1982 era bronze two speed Lewmar 44s.  Though they performed satisfactorily, the 44s were a flawed design from the beginning, mixing aluminum with bronze. The aluminum jaws were ate up with galvanic corrosion.  For more information on the original installation click here.

Continue reading →

Stepping It Up

28 Saturday Apr 2018

Posted by farreachvoyages in Equipment, Modifications, Uncategorized, Upgrades

≈ Leave a comment

Tags

Traditional Boats

16D5BB60-ED2D-4597-A8B0-8AFD348F159A

The removable dinghy step is about 24” long x 9” wide.  The sub frame is iroko and the treads are teak.

We have found getting from the dinghy up to the Far Reach is not always so easy. It’s a little over 40” from the waterline to the top of  the bulwarks.  It’s not just us.  I think many cruisers find climbing from the dinghy to the mothership a challenge, especially as we get older.  And, the traditional stern on the Far Reach means the best way to embark or debark is along-side vice over the stern.  Many modern sailboat designs include the now ubiquitous “sugar-scoop” transom, which greatly simplifies the task of getting from the dinghy to the sailboat.  The disadvantage of a sugar-transom is that it makes the boat less secure.   It’s easy for an  unwanted visitor to get aboard the boat by clandestinely swimming up to the stern and crawling up and over the sugar-scoop.  And sugar scoops, generally, detract from the aesthetics of the boat. But I digress.

Continue reading →

Let There Be Light–Adding LED Lights.

08 Thursday Mar 2018

Posted by farreachvoyages in Equipment, Modifications, Upgrades

≈ Leave a comment

IMG_5070

The Alpenglow LED lights are a nice addition to the Far Reach .

From the beginning of our rebuild of the Far Reach we had three goals that guided our efforts: First, was to make her as simple as possible. Second, was to make her comfortable and enjoyable to sail and live aboard. Last, she had to be beautiful. I call our philosophy “elegant simplicity.”

Continue reading →

Removable Side-Mount Rotating Arm Engine Bracket

23 Saturday Dec 2017

Posted by farreachvoyages in Equipment, Modifications, Planning, Repairs, Sails, Techniques, Tactics, Tips, Upgrades, Voyaging

≈ 4 Comments

Tags

Engineless Sailing, Simple Living

C85BEF26-BB8A-456F-8B21-C8182E480B9C

Here we are departing Hancock Marina on 29 Nov 2015 for the BVI.  There was not a breath of air.  We used the engine to get to the head of Adams Creek on the ICW that afternoon.  The next day we sailed all the way down the ICW, under two bridges, and out to Cape Lookout where we waited for a weather window to cross the Gulf Stream. A few days later a friend linked up with us in the Bight at Cape Lookout and we transferred the engine to his skiff.  We sailed to the BVI engine free.

While I would prefer to have the Far Reach engine free all the time it would require access to a mooring that we could sail on and off. There are very few moorings in NC and none where we are. She is berthed in a small marina with 360° of protection. So, we often carry a Honda 9.9hp four stroke outboard on a custom-made removable swing arm bracket attached to the port quarter. The outboard allows us to more conveniently move her in and out of her slip, make the tight turn onto the fairway, then exit the narrow 1/4 mile long channel out to the Neuse River.

Continue reading →

Another Stays’l Modification—Brass Luff Rings

10 Sunday Dec 2017

Posted by farreachvoyages in Modifications, Sails, Techniques, Tactics, Tips, Upgrades

≈ 2 Comments

BA2AA89D-00E4-4A78-89FF-1C8A566D6061

I replaced the heavy and clumsy brass piston hanks on the stays’l with traditional brass luff rings.

We use SS 7×7 5/16” wire rope for all the standing rigging on the Far Reach, except the forestay. For the forestay, we use synthetic 9mm Dynex Dux (heat treated dyneema). Recently, we modified the forestay to make it easy to detach it from the gammon iron. That modification allows us to open up the foretriangle making it easier to short tack as the forestay is no longer an obstruction to the jib. The modification, includes a partially covered dyneema that serves as a lanyard, and a few low-friction rings.

Continue reading →

A Reefing Jib With A Zippered Bonnet

04 Monday Dec 2017

Posted by farreachvoyages in Modifications, Repairs, Sails, Techniques, Tactics, Tips, Upgrades

≈ Leave a comment

D51CFB36-0E45-4D61-A31A-2BAEB4CCEC8E

On the left is the genoa with the zippered bonnet.   At the upper left of the photo you can see the working jib clew cringle and just below it the leather cover that protects the zipper.  You can clearly see the zipper running diagonally down from left to right. You might also notice there’s is no cover for the majority of the zipper.  It seems to handle the loads just fine.

I have been asked about our bonneted jib a number of times.  I was asked about it again the other day on the Cape Dory forum.  So, it seemed like a good time to provide more detail to those who might be interested.

Continue reading →

Refining the Jib Downhaul System

02 Saturday Dec 2017

Posted by farreachvoyages in Modifications, Sails, Techniques, Tactics, Tips, Upgrades

≈ Leave a comment

9788AE71-B0C5-4D91-9169-FE224C6B3881

On passage, with a double reefed main and a stays’l.  About 150 nm SSE of Bermuda enroute to the BVI, Dec 2015.  The downhaul keeps the head of the sail secured to the deck yet the halyard remains connected to the jib and ready to be hoisted in an instant.  The coiled downhaul is tied to the lifeline.  Photo by Tricia Stone

I like sailing with a hank-on jib. A hank-on jib is more efficient and longer lived than a furling headsail. It is less expensive. There is less maintenance required and it is more reliable. But it is not as convienent as a furling jib…no doubt about it. While there are techniques for managing a hank on jib that are tried and proven, it does take skill, occasional acrobatics, and some planning to keep things under control. Our genoa is about 390 sqft. But, it has a bonnet that we can zip off that reduces it to a working jib size of about 280 sqft. But, the challenges are similar with either headsail.

Continue reading →

Upgrading Stays’l Winches–Phase I

30 Monday Oct 2017

Posted by farreachvoyages in Equipment, Modifications, Upgrades

≈ 1 Comment


IMG_0709

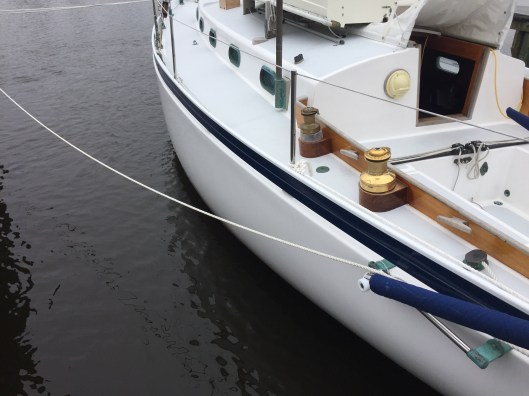
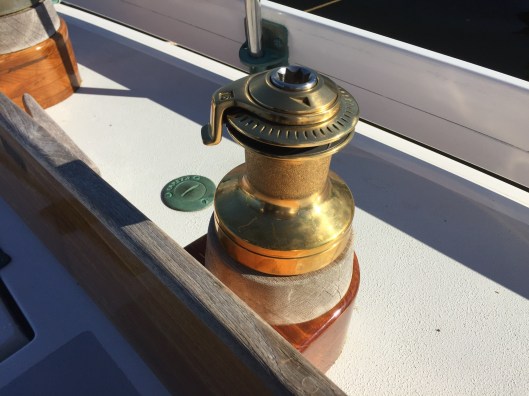
I originally installed the small, but adequate, Lewmar #10, non self tailing, winches as stays’l sheet winches because I had them on hand and it helped keep us on budget.  You can see one here just forward of the #44 primary winch.

When I rebuilt the Far Reach, paramount to the effort was staying on budget. It was not easy. I had to determine a way to make hard choices. One thing I decided was to make use of what I already had if it was reasonably serviceable and relatively easy to replace or upgrade later.  Winches fell into that category.

The original two speed ST Lewmar 44s were in bad shape. Though powerful, they were a poor design that mixed bronze and aluminum–there was some ugly galvanic corrosion. But they were ridiculously expensive to replace. I could not work around the cost as I was also building a new rig. So I rebuilt them best as I could and pressed on.

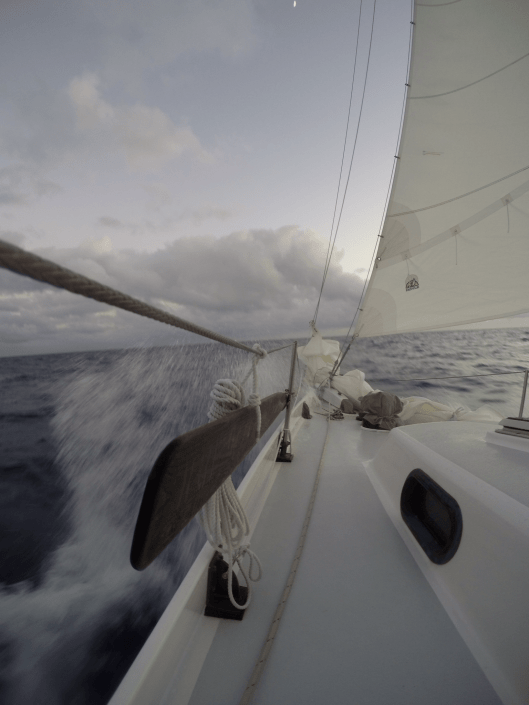
When I rebuilt the boat I also redesigned the stays’l layout  and eliminated the club-footed boom.  I installed bronze sheet fairleads on the side deck and installed small (using what I had on hand) #10 single speed non-self-tailing sheet winches on each coaming forward of the #44 primary winches.  The design really proved itself on the trip to and from the West Indies but the small winches were barely adequate.

This past year, I set aside some money every month and during the summer I purchased four new bronze Lewmar Ocean Series self-tailing winches that were on sale. I bought two bronze #46 two speed ST winches to replace the old 44s. And, I bought two bronze #16s to replace the #10 stays’l winches.

IMG_0116

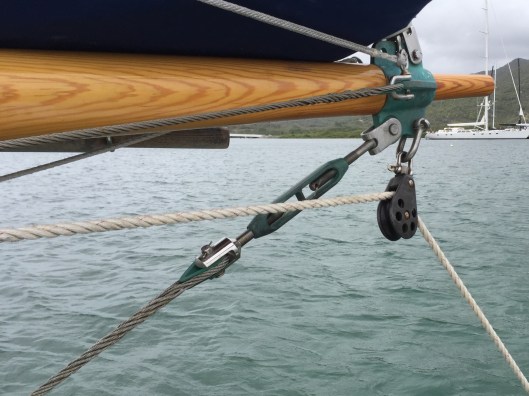
Though I did not install them this this time, the new #46s will replace the #44 primary winches during Phase II.  Because I now use a foot/turning block for the jib sheet, I’ll replace the two inch tall teak pad with a one inch tall pad.  That plus the lower profile of the ocean series winch will significantly lower the height of the top of the winch

The #46s have a different bolt pattern than the #44s.  I’ll need to build new teak bases for them this winter. But the 16s have the same pattern as the 10s, so installing them is a simpler job.  I decided now was a good time to install them.

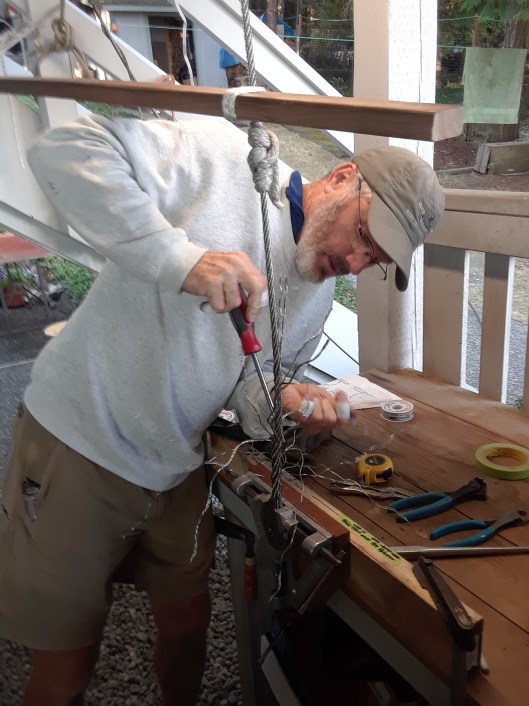
The first order of business required minor disassembly of the overhead and some cabinetry to get to the nuts on the underside of the deck.  This was possible because I designed the new interior to be removable.  It took about 30-40 minutes.

IMG_0143

Getting to the nuts was easy.  Removing the 9″ long bolts was more difficult.

The second order of business was to remove the nearly nine inch long, 1/4″, silicon bronze bolts that secured the winches. This was not a simple matter as I had used plenty of polysulfied bedding compound and butyl tape when I installed them several years ago. But, after a day of trying various techniques I managed to get the bolts out intact and without damage.

IMG_0145

Third, I cleaned the bolts at home in the shop and polished them up with a buffing wheel so they would more easily slide back down the long holes through the 2″ tall bare teak rider pad, the 4 1/2″ tall base, the 7/8″ thick deck and the 1/4″ G10 backing plate.

I used a 12″ long 1/4″ drill bit to clean out the holes.  I re-chamfered the holes in the teak riser pads to help drive bedding compound around the bolt shafts below the surface of the winch base when I tightened the nuts.  Then I test fit the bases and taped them off.  I removed the winches and positioned the bolts through the holes. I wiped the winch base and the teak pad down with acetone to remove residual oil and grease.  I used butyl tape to make small donuts around the bolts just under the winch base. I applied the polysulfied and installed the winches one at a time. My daughter Cailin used a large screw driver to hold the fasteners in place while I tightened the nuts below deck with a deep socket wrench. We cleaned up the squeeze out, removed the tape, and reinstalled the drums. They looked great. They are more powerful than the #10s and also they are be self-tailing.

IMG_0160

The bronze Ocean Series appear to be very nice winches.  They require no tools to disassemble for cleaning.  These are the model BBB which has bronze covers over the ST jaws vice the polymer covers which can degrade in the sun.

I look forward to using them and seeing how they work.  Replacing the primaries is Phase II and replacing the jib and main halyard winches is Phase III.

← Older posts
Newer posts →

Categories

Archives

Blog at WordPress.com.

  • Follow Following
    • Far Reach Voyages
    • Join 41 other followers
    • Already have a WordPress.com account? Log in now.
    • Far Reach Voyages
    • Customize
    • Follow Following
    • Sign up
    • Log in
    • Report this content
    • View site in Reader
    • Manage subscriptions
    • Collapse this bar
 

Loading Comments...