

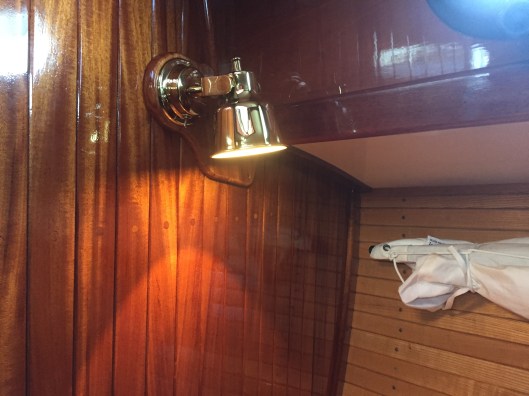
The Alpenglow LED lights are a nice addition to the Far Reach .
From the beginning of our rebuild of the Far Reach we had three goals that guided our efforts: First, was to make her as simple as possible. Second, was to make her comfortable and enjoyable to sail and live aboard. Last, she had to be beautiful. I call our philosophy “elegant simplicity.”
It is easy to make something complicated. It takes a lot of thinking and effort to keep it simple, especially when so much of what is advertised or written about in the sailing rags argues why you must have all kinds of complicated and unnecessary equipment or accessories.
While we have been delighted with the results of our efforts, we also expected over time to add things or make changes when it became evident to us that we were ready for a specific change, addition, or modification to improve our sailing experience.
I have been happy with our kerosene navigation lights. They have worked perfectly. Our interior kerosene lamps have also performed very well. However, we found we were using our battery headlamps more often than we originally planned, mostly for task oriented lighting, e.g. Cooking and reading. Thus, we decided it was time to add a couple of interior LED lights.
We have a small battery system on the Far Reach–a single 100ah AGM battery and a a movable semi-flexible 30 watt solar panel. Since we have no inboard engine or wind generator our entire electrical power requirements are dependent on the solar system. I initially sailed the Far Reach without any electricity at all…and I was happy without it. But we needed a way to charge a laptop for the kid’s schoolwork. So we researched and installed a minimal solar system. This simple relatively inexpensive system has met our needs for more than two years and proven to be very reliable. We do not have a chart plotter, depth sounder, spreader lights, or hard wired radios. We charge the laptop, cell phone, iPad, and on occasion operate a couple clip on fans and a small portable 12v vacuum. Thus, we felt we could add a couple of LED lights without a need to modify our solar system.
We researched all the lights available carefully avoiding any cold white LED lights. We definitely desired a warm-colored light. Alpenglow Lights consistently received the best reviews for quality of build, reliability, service, and light color.
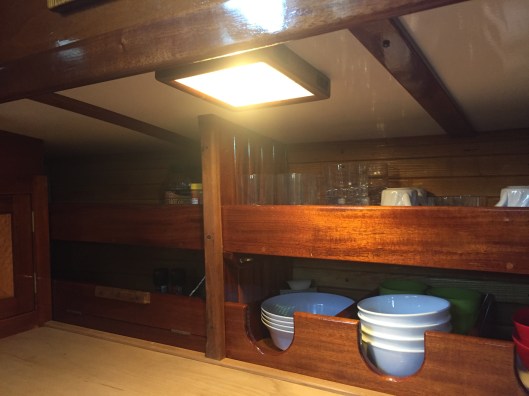
Our number one lighting priority was to install a wide angle light over the galley countertop. We chose the Alpenglow 7″x7″ Catalina model with high/low white and red light. In a moment of weakness, however, I also ordered three Caribbean berth reading lights. These are the deluxe model with a dimmable rheostat. As soon as I completed our on-line order and hit “send” I had buyers remorse. What was I doing? I did not want the complexity or the excessive wiring on my simple boat. But, I thought about it and finally decided against canceling the order right away figuring if I still felt the same way after they arrived I could send them back to Aplenglow.

We purchased the square “Catalina” light for task lighting in the galley and the “Mediterranean” lights for the berths.
We received the lights in the mail a few days later. They seemed to be very well made. I took them down to the boat and determined where they might be positioned. I made up a 12v extension cord and wired the lights so I could position them in different locations in the boat to get a feel for the arc of illumination. The entire galley was bathed in light. The dimmable berth lights were excellent too. Gayle and I conferred and agreed where they would work best. I still had reservations but I could see the advantages of the lights. I determined all I had to do was run some wire. I could remove them if I didn’t think they were valuable. Once satisfied with my reasoning, I started taking apart and removing interior trim to develop the wire plan. Next, I ordered 100′ of Ancor 16 gauge duplex safety wire along with heat-shrink ring terminals and butt-connectors. I also fabricated some mahogany pads to mount the lights to and then applied seven coats of varnish to the pads.
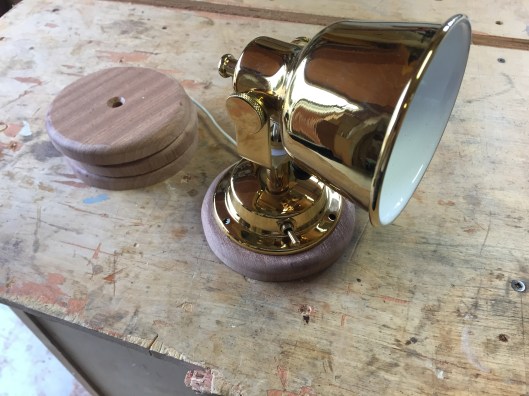
The first pads I made for the lights were sapele and were too brown. I made another set from African Mahogany which matched the staving. I routered out the back to create a channel for the wiring.
It took two days to run the wire and install the chaffing guards and wire ties to secure the wire in place.
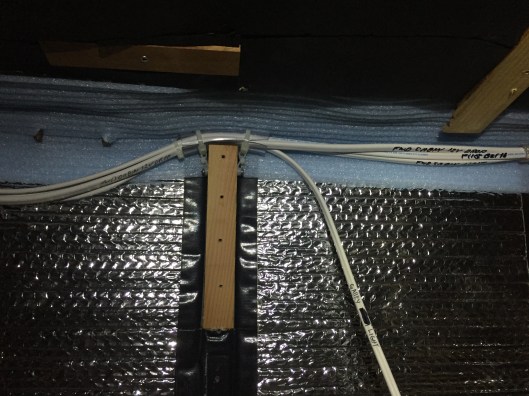
I labeled all the wiring along the run with a sharpie but used a label maker and clear heat-shrink tubing at the distribution panel. I used split hose as chafing guards at potential rub points and wire ties to secure the wiring very 18″ per ABYC standards.
A couple more days were spent reinstalling the trim, mounting the new pads and light fixtures, and crimping and heat shrinking ring terminals and connecting them to the Blue Seas 8 position distribution panel. The panel was already in place supporting our existing solar system.
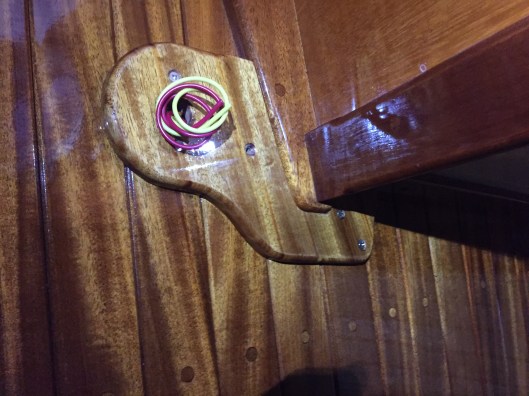
There was some complex joinery involved with the forward bunk light. I used small SS fasteners to align the parts then replaced them with bronze fasteners.
We have not had much chance to use the lights but they seem to be very nice and will save us a lot of AA/AAA batteries. We still plan to rely on the kerosene interior lights because, well, because we like them best. And regarding the added complexity? So far, I have not hyperventilated.
All kidding aside, we think adding a few lights was a smart move and will improve our enjoyment of the Far Reach.
