
The dorade boxes were in bad shape. Originally, I varnished them but finally painted them white after repeated mysterious varnish failures.
I have known for a long time that I needed to replace the dorade boxes on the Far Reach. During the six year long rebuild I was on a budget so I had to decide how to spend the time and money, where to save the time and money, and when to live to fight another day. So, building new dorades was saved for another day…which, finally, arrived a few weeks ago
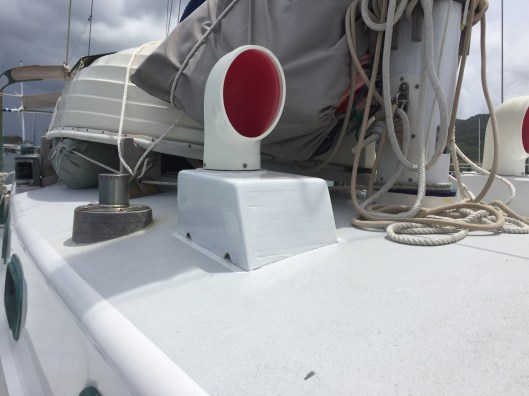
The original boxes where in bad shape. The countersunk holes for fasteners were too big for wood plugs, there were gouges in the wood. Epoxy repairs were required. I cobbled them together as best I could, cleaned them up, varnished them, and reinstalled them. Once we launched the Far Reach and were actively sailing her we had no trouble maintaining the varnish on the bowsprit, coamings, or winch bases. But, the dorade boxes were another story. Despite an aggressive varnish maintenance plan, the varnished repeatedly failed while I was sailing in the West Indies. So, I just painted them white in the Virgin Islands and put replacing them my list of projects for later.
The original design is OK but, for several reasons, not great. First, while the beveled slope on the front of the box has a nice refined look, it requires the opening ferrule (the down tube that penetrates the cabin top) to be cut down excessively on the forward side to allow room for the beveled front to slope back. It’s a form over function design. I’m not a fan of it. The sloped front also makes it impossible to have a tidy finish to the bedding compound on the inside front of the dorade because you can’t access the space forward of the ferrule. So, I designed the new boxes to be square which is how Olin Stephens designed them. I think they will look very nice on a Cape Dory. If in doubt take a look at Olin Stephens magnificent 52’ yawl Dorade (which gave the innovative box its name). As a side note, Dorade, built in 1929 won the Bermuda Race in 1930 and the TransLant I’m 1932. She is still sailing and being raced. A few years ago she won the TransPac for the second time, the first time having been in 1935. Should I mention she was, and still is, steered with a tiller?

Note the overlapping ferrules that prevent line of sight water migration from the cowl into the opening ferrule.
Second, the method of construction while adequate can be improved upon by minimizing end grain exposure. End grain is an avenue for water/moisture to gain access into the cell fiber of the wood. Rapid drying through the end grain can also cause checking which usually occurs if the wood is left bare. If the wood is varnished it’s not a problem but since I intend to leave them bare, protecting the end grain is important. Plus, a well built box just looks nicer.
Last, since the dorades will be left bare, epoxy is not the best adhesive. The only 100 percent waterproof adhesive is resorcinol. For resorcinol to work properly the joinery has to be tight and assembling the boxes with dados, etc creates better surfaces for gluing. Dados are not difficult to cut but they do take some special tools.
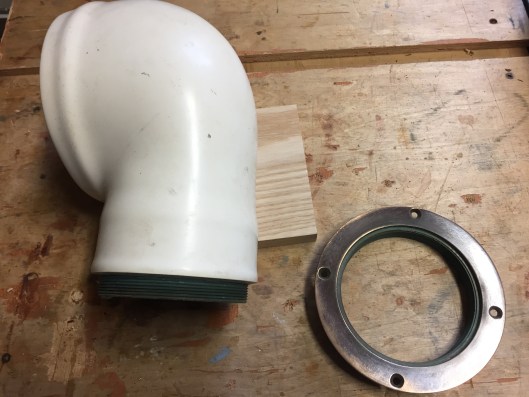
Below are a couple pictures. The first is the molded riser to which the dorade is secured. You can clearly see the opening ferrule shortened dramatically on the font side to accommodate the sloped back box. I covered the opening with plastic and tape while the boxes were removed.

A beveled box requires the front of the opening ferrule to be cut down. This is clearly form over function. I think it’s a mistake. The peeling Awlgrip is a result of the tenacious grip of 3M 4000 adhesive I used to bed the boxes during the rebuild.
The first step was to take careful measurements so I could purchase enough teak. I like to take the measurements and then draw out the boxes on paper labeling the parts. From the drawing I can determine the dimensions of wood I will need. Then I went to the Mill Outlet at Atlantic Veneer and sorted though their stack of Burmese Teak off-cuts. Next, I milled the teak to 3/4” thick planks. I carefully laid out the planks and determined the most efficient way to cut them into the components parts minimizing waste. With the cut schedule as a guide I cut the planks and stacked the wood components. I set up my table saw for the dado cuts.
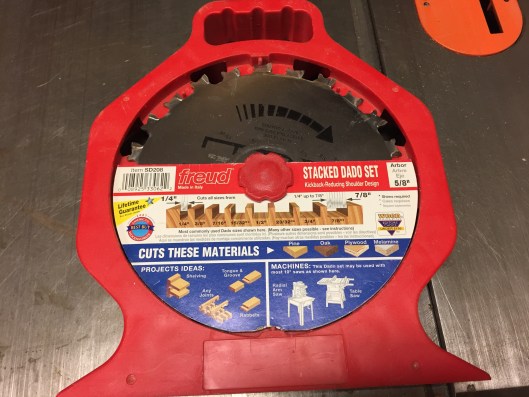
I have used this same Dado set made by Freud for maybe 12 years. There is nothing fancy about it but it has proven to be accurate and reliable.

I swapped out my regular 10” blade for the appropriate number of dado blades to create the cut width. Do I need to mention to always unplug a power tool before changing the blade?

Dado blades are scary looking. Extreme caution needs to be exercised around any spinning blade. If you don’t know how to use power tools correctly and safely please get an experienced person to show you how.

I used my modified sliding miter gauge to make the dado cuts and cleaned up the corners and machine marks with a Veritas Bull Nose Rabbet plane.
The next step was to cut end pieces to protect the vulnerable end-grain.
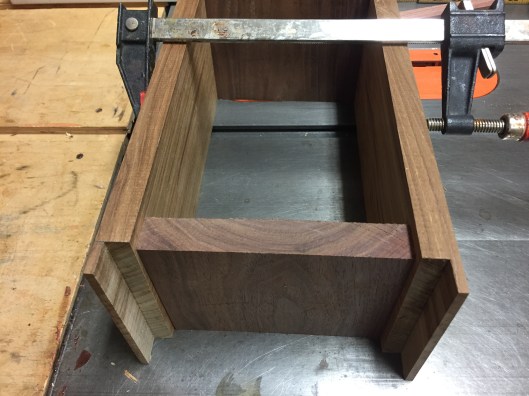
A good photo of the dado joint. The walnut is just a spacer to ensure I cut the end pieces the correct length.
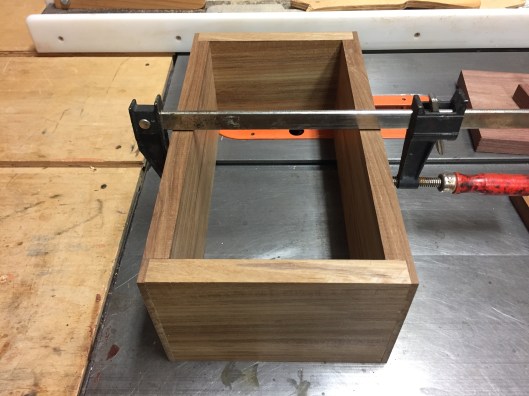
A good tight fit minimizing end-grain.
I would love to have beautiful bronze copper cowl vents to sit on top of the dorade boxes. But, I have not had the good fortune of finding quality ones at a price mere mortals can afford. Fortunately, however, a great friend made a generous gift to me of four used PVC vents (two 4″ vents and two 3″ vents) with threaded bronze inserts and bronze flange bases. They are a huge advantage over the Nicro plastic flange base vents currently available at marine chandleries.
One of my mentors gave me four PVC cowls with integrated bronze flanges which are vastly superior to the new plastic flanges on Nicro vents.
So, my plan was to install the 4″ cowls in the main dorade boxes and retro-fit the 3″ vent into the dorade box I mounted on the fantail during the rebuild. Once completed, I’d finally be rid of those leaky fragile plastic base cowl vents. It’s too bad they don’t still offer the bronze and PVC combination. Seems like it would be much more affordable and practical than the other options.

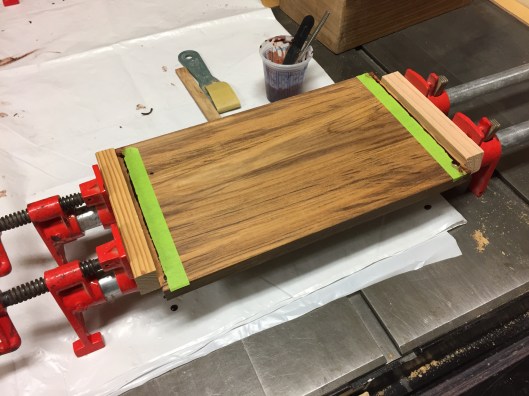
Areodux 185 (low temperature resorcinol) adhesive is easy to use though it must be mixed by weight. It’s the only adhesive available that is 100 percent waterproof, boil proof, impervious to fuels, and approved for overhead structural lamination. You can purchase it through PB Adhesives.

Unlike epoxy, resorcinol must be clamped aggressively and hard.
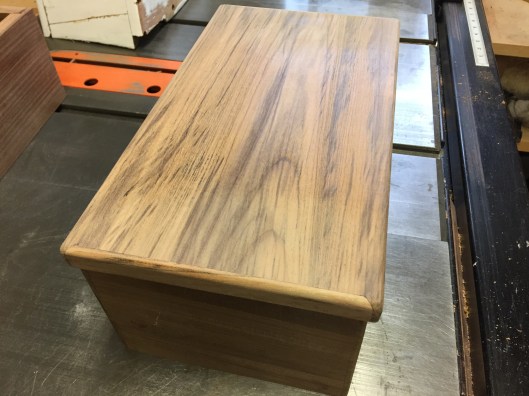
After the resorcinol had cured, I unclamped the boxes and started work on the dorade lids. The most common way to build the lids is to to either cut the top flush with all the sides and glue and screw them to the box sides (the way they were originally built) or to use lexan for the lids. I have seen lexan lids and they look good. They also let some light in to the boat interior via the opening ferrule. But, I didn’t think they would look as harmonious on the Far Reach as on a stock Cape Dory. They have a more modern look and FR looks, to me anyway, like a more traditional boat.
The problem with just cutting the lid from teak is, as previously mentioned, the end-grain is exposed to the weather. But, by gluing in small end grain caps with resorcinol the grain checking can be largely prevented. Normally you can’t glue across the end grain as it will result in a cracked glue joint. But, with small dimension lumber it is not normally a problem. Though the box sides are all quartersawn, I did not have enough quartersawn teak for the lids. Quartersawn wood has less movement so that would be the best way to go. We will see what happens.
I cut a 3/16” wide strip of teak then cut 45° bevels on the ends. I laid those over the ends and marked the area to remove with my knife. A sharp edge is more accurate than a pencil. I used a router with an upper guide bearing to remove most of the wood. I finessed the ends with a sharp chisel. Once the end pieces fit tight I glued them with resorcinol and clamped them tight.
Clamping the dorade lid end-grain caps.

The end caps were simple to cut and fit.
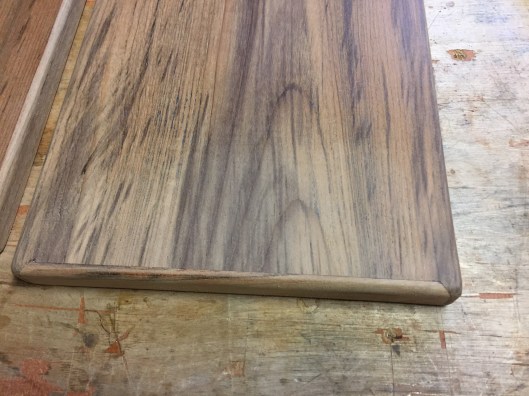
There is minimal exposed end grain.
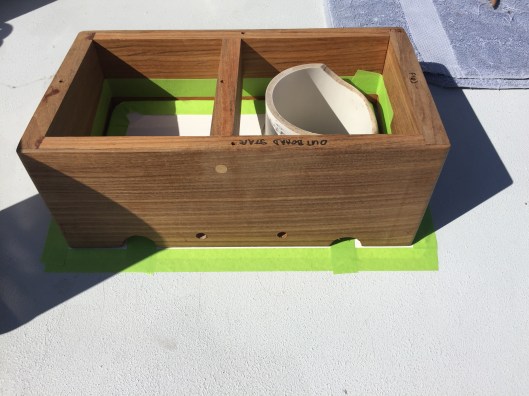
Checking the fit of the box before cutting the holes for the cowl vents.
The lids will be secured with four bronze wood screws so they can be easily removed.
With the lids glued up and clamped tight I turned back to the boxes. I installed #8×1 1/4” flathead fasteners through the end pieces of the boxes and into the sides as added insurance. In other words the box sides are glued and screwed together. I counter-sunk the screws and then installed teak plugs. I chiseled them off flush and sanded them smooth.
I also took an additional step not part of the original CD box design. I installed a small 1 3/4” deep teak divider in the box. The divider prevents spray or rain water from being blown down the cowl and across the inside of the box into the opening ferrule (downtube) and consequently into the interior of the boat. Olin Stephens’ original design (see drawing in picture near the beginning of this post) has the two tubes overlapping so there is no direct line of sight path between them. But, on my boxes, the base of the cowls don’t extend down into the box far enough to prevent line of sight migration of water across to the opening ferrule. The divider block accomplishes the same thing. This is a small but important step in making the new dorades better than the original construction by Cape Dory.

The cross-piece prevents line of sight water migration between the cowl vent and the opening ferrule. This piece can be easily retrofitted into many dorade boxes.
I took the dorade boxes down to the Far Reach to scribe them to fit the crown of the cabin top. Scribing just means to draw a line, usually with a compass, using the actual place the part will reside as a template or guide. The lines (or marks as it were) inform you where to cut so the fit is just right. The key to scribing is to never change the orientation of the compass once you start making the mark.

Scribing is a very useful skill and essential for producing a tight accurate fit when the surfaces are not flat or square.
To scribe the box I set it in place and used door-shim wedges to prop the box up so the top was level. Then I set the compass to span the gap on the end with the wedges holding up the box and carefully pulled the compass around the box. When I cut along the line with my jig saw the box will drop right into place and require only minor adjustments.
Next, I used my Bosch jig saw to cut along the line I scribed on the box sides. I smoothed the freshly cut edge with a spoke-shave. Then I used a trim router with a 1/2” round over bit that had an integral guide bearing to radius the edge. The radius on the edge will match the concave corner molded into the molded riser on the cabin top. I made two passes with the first pass shallow. On the second pass I set the bit deeper than usual leaving a 3/16” edge. The edge is easier to file for final shaping to ensure the best possible fit on the boat.

I used a 1/2” roundover bit to radius the bottom side of the dorade to fit the riser that is molded into the cabin top.
I used a 4 1/4” hole saw to make the cut out for the bronze cowl vent base. The key to avoid tear-out when using a hole saw is to either clamp a piece of wood to the opposite side or stop cutting when the center drill bit penetrates the other side—then flip the wood over using the center drill hole as a guide and cut back though connecting to the original cut.

A hole saw is the best way to get a accurate cut though I have made cuts like this with a jig saw and a cabinet makers rasp.
With the hole cut to satisfaction, I used a cabinet rasp to enlarge the hole slightly and round over the edge so the base easily fit flat with a bit of wiggle room. The wiggle room is important to provide a way for the bedding compound to flow down into the hole around the base.
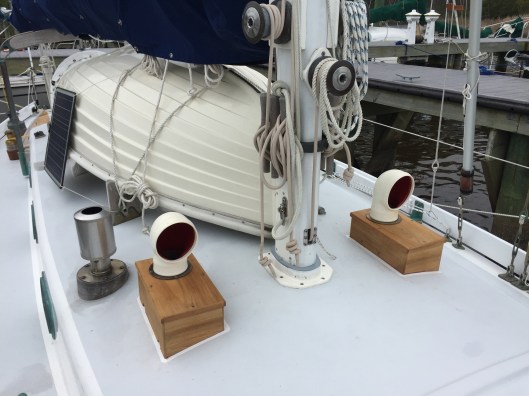
With a couple of days of improved weather at hand I taped off the deck and the box. I installed the teak dorades with mahogany colored Sikaflex 291 Slow Cure bedding compound. Then, I plugged the fastener holes with teak plugs. Finally, after trimming the plugs flush, I installed the bronzed base PVC cowls.
I think bedding wood with a brown colored compound creates a much better look than using white compound. After taking the photo I also taped off the vertical sides of the box to protect the wood from the bedding compound squeeze-out.
We will leave the dorade boxes bare.
We are very pleased with how the dorade boxes turned out. The building entailed a lot of steps but was not difficult. Dado joints are simple when compared to more complicated joinery. Total cost was about $150 not including the resorcinol adhesive which I had on hand.
Most of what I learned about building dorades I read in Lin and Larry Pardey’s excellent book, The Cost Conscious Cruiser.

Very nice!
Sent from my iPad
>
LikeLike
I built my Doade boxes out of PVC lumber, glued with regular PVC cenment.
LikeLike
Very good. As long as you are happy with the result and it performs to your satisfaction.
LikeLike