
Tags
I spent three weeks on Vancouver Island splicing rigging and helping my friend Kaj install the rig on his self built Lyle Hess designed 34’ Falmouth Cutter.
As mentioned in an earlier post, I was invited by my friend Kaj Jakobsen, to help him step the mast and splice the standing rigging on his beautiful Lyle Hess designed 34’ Falmouth Cutter. I flew to Vancouver Island in the middle of July. I had never been to British Columbia and all I can say is wow! It is gorgeous. It reminded me of Montana but with a lot of water. Many islands. Clear water. Deep fiords. Lovely Douglas Fir trees everywhere. Clear sunny skies. Perfect temps.

The view from my splicing bench. That’s Salt Spring Island, once called home by the famous sailing couple Miles and Beryl Smeeton. They moored their legendary ketch Tzu Hang in a cove just around the point. One day while I was splicing wire I looked up and there was a pod of killer whales swimming by….
After I arrived we spent a day or so sorting out how we wanted to proceed. Kaj’s boat Astrid was on the hard. Kaj had her hauled a few days before so he could renew her anti fouling paint and attach the bronze tangs for the boomkin and the bobstay fitting.
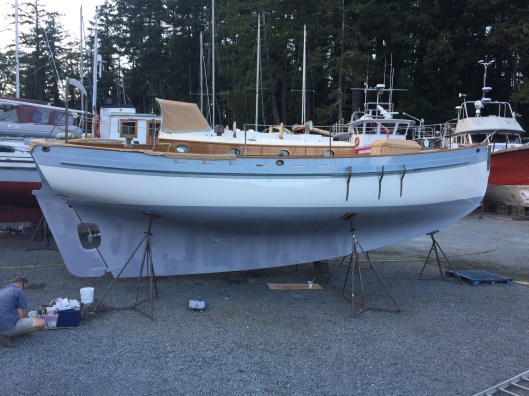
Kaj mixing up some bottom paint. Astrid is simply stunning. She is, without question, the most exquisite boat I have ever seen….
The previous summer, Kaj built the 53’ Sitka spruce spar with Jean Gaudin at Abernathy and Gaudin Boat Builders in Brentwood Bay. The spar, varnished, but without hardware, had been stored since the fall. Kaj built some of the hardware and made patterns for casting the rest during the winter and spring. But, he still needed to mount all the hardware on the mast. He had 600’ of 3/8” 7×7 316 SS rigging on hand but the bronze thimbles, which we needed, were at Port Townsend Foundry. Port Townsend is in Washington, across the Juan de Fucca straight. We divided up our tasks.
Kaj focused on preparing to get the boat back in the water and I rode the ferry to Port Angles, Washington to get the thimbles. The ferry ride across the magnificent Juan de Fucca straight was a lot of fun. Once there, I linked up with Pete Langley who had driven up from PTF. Pete is the owner of PTF and had taught me how to make the pattern for our gammon iron during the our rebuild of the Far Reach. He cast our gammon iron in aluminum bronze. It was great to finally meet Pete. He took the time off to personally deliver the thimbles we needed since we were in a time crunch. Pete is good people.

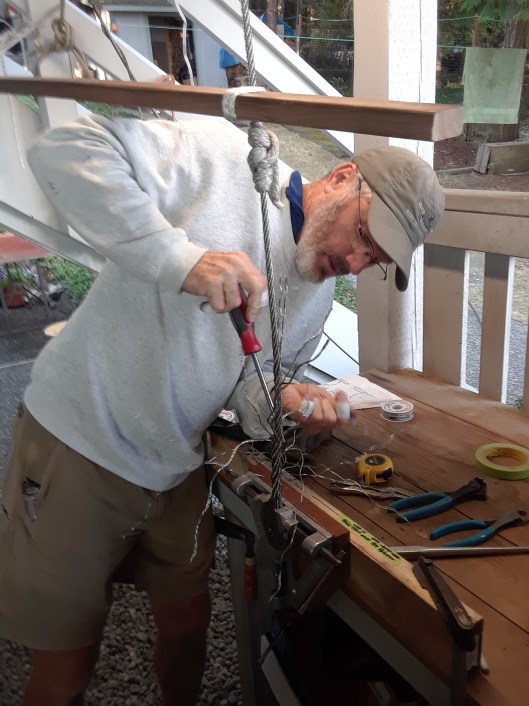
Before we picked up the thimbles we needed for the project I made a practice splice to get a feel for the wire and my set up. Note the thimble does not have a hole drilled for the turnbuckle clevis pin. It was a throw away splice.
Once back in Vancouver Island I set up my splicing bench and began splicing the upper end of the wire rigging. Kaj used the sail plan to determine the wire lengths. After splicing one end I unrolled the wire from the spool cut it to length, plus 36” extra. It takes 24” of wire to allow for the circumference of the thimble plus the length of the splice. Then I allowed another 12” length to be on the safe side until we measured for the final overall length.

A splice that only has to be faired and the wires broken off to be completed.
The basic approach was to spice one end of each of the 14 wires, allowing for the extra length. Then once the mast is stepped, rig the upper end of the wires and mark the lower ends on thimbles, installed in the turnbuckles, then splice the lower end. That way, the rigging will fit perfectly. By completing 14 splices up front I was dividing the task in half—half the splices at the beginning of the project and half towards the end, after the mast was stepped. Once the hardware was attached to the mast and the upper splices were completed it was time to go get the mast.
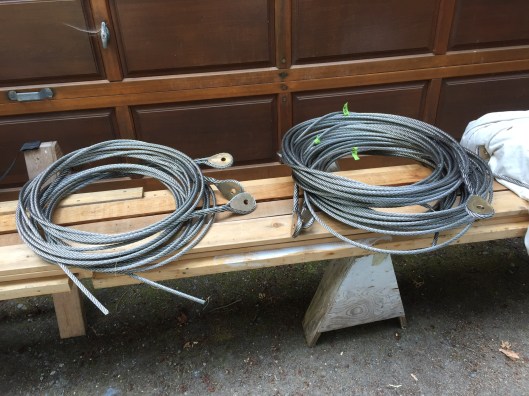
A bundle of wires spliced on one end and readied to be installed on the mast. Once installed they would be measured for length then removed and the bottom end spliced. Then, another trip up the mast for the final installation. It means a lot of going up and down the mast but it ensures a perfect fit.
The boat was at Canoe Cove while the mast was at Brentwood Bay about 15 NM away. So, we took Astrid around the gorgeous Saanich Peninsula and down Satellite Channel and Saanich Inlet. We lost power on the way but quickly transitioned to the inflatable with outboard as a yawl-boat. Easy day. Made it into Brentwood Bay. Spent the night rafted up to a big wood schooner.

The 53’ hollow sitka spruce mast that Kaj built the previous summer.
Next morning, we loaded the mast after enlisting the support of a group of wooden boat builders and one innocent by-stander, and together we loaded the mast onto sawhorses positioned on the deck of Astrid and strapped it down. Next, we headed back to Canoe Cove. We made the whole trip home still using the yawl boat. A 4 HP Yamaha 4 stroke did the deal. Very impressive.

Astrid after we loaded the mast for the trip back to Canoe Cove.
We worked till 0230 the night before stepping the mast, taking care of the last minute projects. Next morning we ponied Astrid over to the government warf in Sydney, BC. Once again we used the 8’ inflatable with the 4hp Yamaha. The crane was there with Sergio, a highly professional rigger from Blackline Marine Services. He knew exactly how to rig and protect the spar for stepping. It was a straight forward event. No drama. Took one hour from start to finish. We stayed the mast with halyards and line and tightened down with truckers hitches.

Sergio from Blackline Marine and Rigging was superb. He guided the entire mast stepping and was highly competent and professional.

Kaj and I were perfectly suited to work together for days on end with little rest and no down time. I had a great time with him and his family. It was an honor to contribute, be it in a very small way, on such a noble project. I think Kaj would make a great shipmate on a long passage.
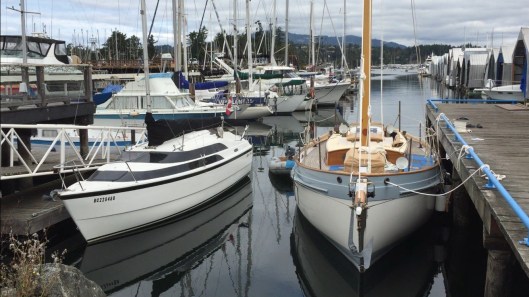
A McGreger 26 on the starboard side of Astrid. Could there be two more different sailboats in the world!
Astrid looked fantastic with the mast installed. It has a lovely rake. She is a beautiful boat. We were exhausted and relieved after the mast stepping. We left her secured to the dock and walked down the street to a small bistro for breakfast and coffee. We went back to Astrid and both collapsed and slept for about an hour. Then, we ponied Astrid back to Canoe Cove, once again with the inflatable and 4hp Yamaha outboard.
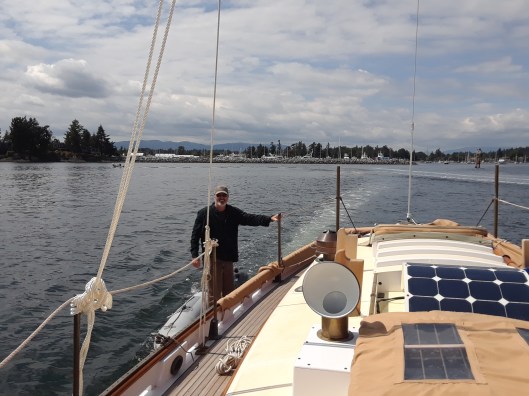
After the mast was stepped we ponied Astrid back to Canoe Cove. Note the gallows teak cross timber is removed so we could lift the mast off the boat.
With the boat back in her slip in Canoe Cove, we fit the upper end of the lowers, marked them for length, removed them, and I took them to the splicing bench. I spliced the bottom end of the wires. Then Kaj climbed the mast, to attach the top end of the wires to the tangs and I attached the lower ends. They fit perfectly. We did the same for the aft intermediates, then the upper shrouds, and finally the head and back stays. It’s the same process I used on the Far Reach.

Kaj using seizing wire to secure a cap shroud to an upper spreader.
Kaj and I installed the rigging over several days. He used a variety of climbing rigs to get up the mast. He used his mountain climbing harness and we also used a 4:1 block and tackle with a bo’sun chair. For the cap shrouds and headstay/backstay we used a direct lay where I winched him up and his Dad tailed. We needed the direct lay to get to the very top as the accenders and blocks made reaching the clevis pins too difficult. Like his son, Kaj’s Danish born father is a world class woodworker too.

That’s Kaj’s father Frank feeding the wire up to him. Frank also built a boat from a bare hull when he was a young man. He is also a world class wood worker. I have seen his work and it is amazing. I wish I had half the wood working skill of either of these men! It was enjoyable to see how they interacted and worked together. It was evident to me the respect and admiration they have for each other.
A quick word on climbing harnesses. If you are looking for a mast climbing methods—and there are many—a climbing harness is a good way to go. But…do not use a rock climbing harness as they are not designed to sit in for long periods of time. I have a Native Tribe harness which is used by arborists. Very comfortable and relatively inexpensive compared to those sold at Marine chandelries. If there is interest, I can write something about a safe robust system I use.
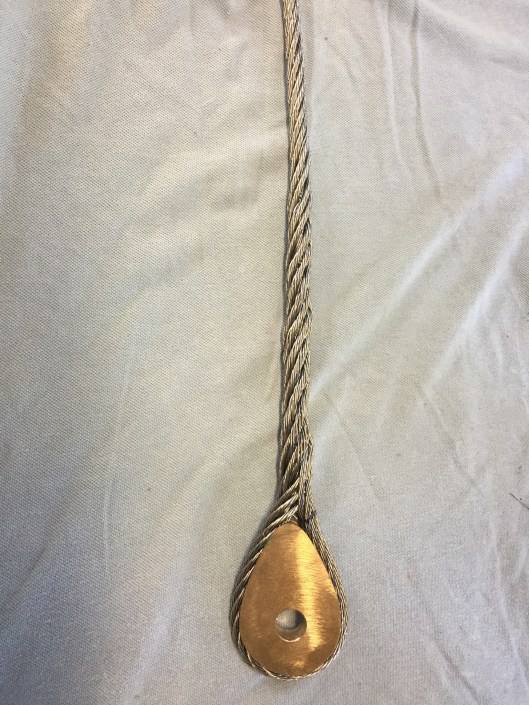
A completed tapered Liverpool splice. No other wire termination has the advantages of a proper splice. It strong, beautiful, long lived, and can be easily inspected.
Anyway, we completed the standing rigging. Kaj has only to mount the hardware on the boom and install it to complete the rigging. I flew home on the 10th of Aug. I had a great time. The scenery was breathtaking…the weather awesome.

Kaj sent this picture to me after I returned home. I am very pleased how they turned out. Can you imagine this boat with swage or compression fittings? I can’t.
This is the second boat I have rigged with handspliced rigging. My boat has 5/16” 7×7 316 SS rigging. Kaj chose 3/8” rigging for Astrid which displaces 20,000 lbs. The larger rigging is a little harder to splice than what I have on the Far Reach. I believe Cape Dorys are well suited to the long lived and very strong Liverpool spliced rigging. It’s another option to consider. Certainly less expensive and stronger over its life cycle than contemporary swages or compression terminal fittings.
For more info on Kaj Jakobsen and his boat Astrid visit his website at: http://knjwoodworking.blogspot.com
