
Tags
Cape Dory 36, Cape Dory sailboat, Engineless Sailing, Lin and Larry Pardey, Sailboat rebuild, sailboat restoration, sculling a displacment sailboat, Sculling oar, Taleisin, Traditional Boats
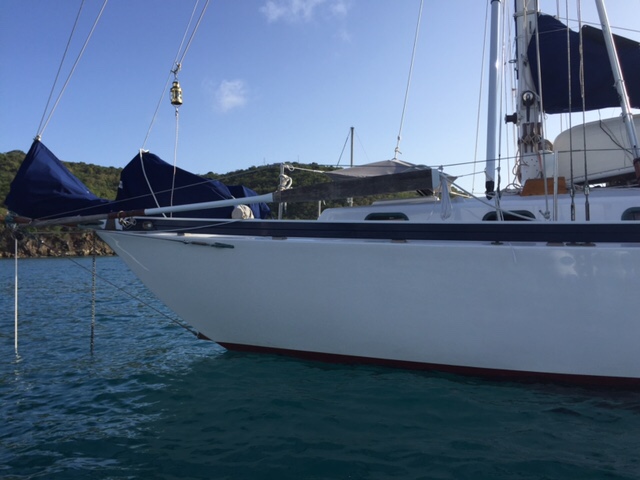
During the six year rebuild of the Far Reach I decided to remove and sell the original Perkins 4-108 50 hp diesel engine (you can read more about the decision process to ditch the engine here). We initially relied on a sculling oar to propel and maneuver the boat for the first year after the launch which included 3,500nm of sailing and a voyage to the Virgin Islands and back to North Carolina.
Since then we have continued to sail without an inboard engine. And, though we now have a custom swing arm bracket that supports a 9.9hp high thrust outboard engine, we still carry the sculling oar and employ it whenever we can.
When we employ the sculling oar it always gets attention. People seem to be fascinated by it. I get lots of questions about the oar, not because other sailors want one (quite the contrary) but because they are genuinely interested in how it works…and how well it works. I think they are naturally curious because it is something from the past. So this post is intended to shed a little more light on the sculling oar.
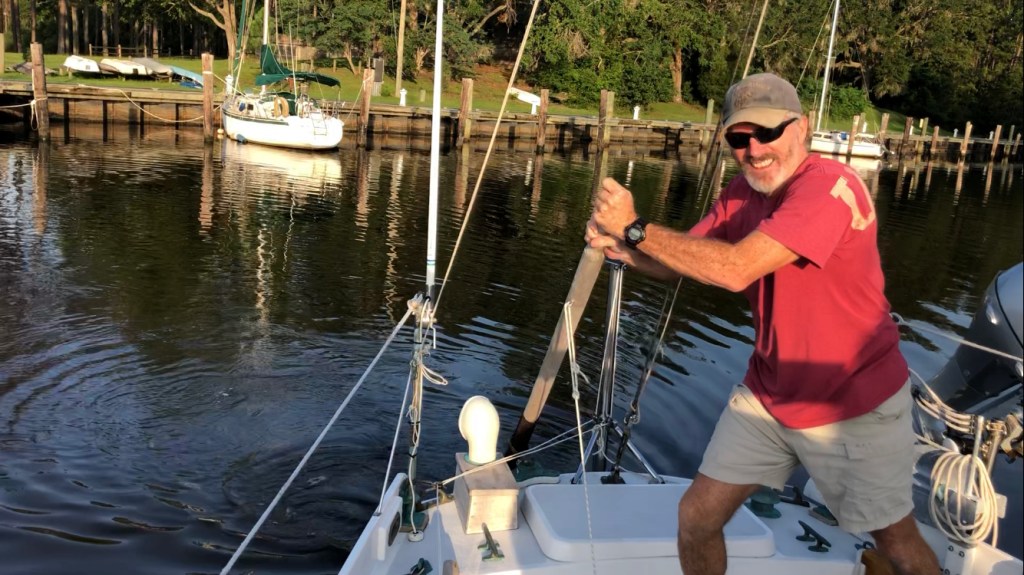
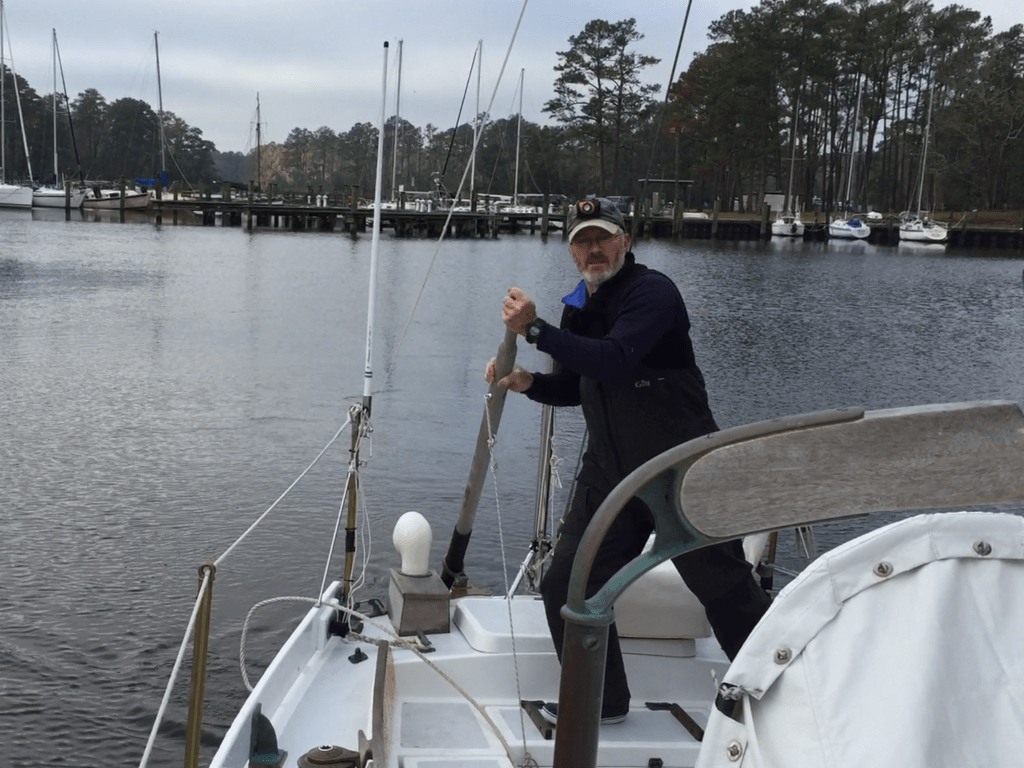
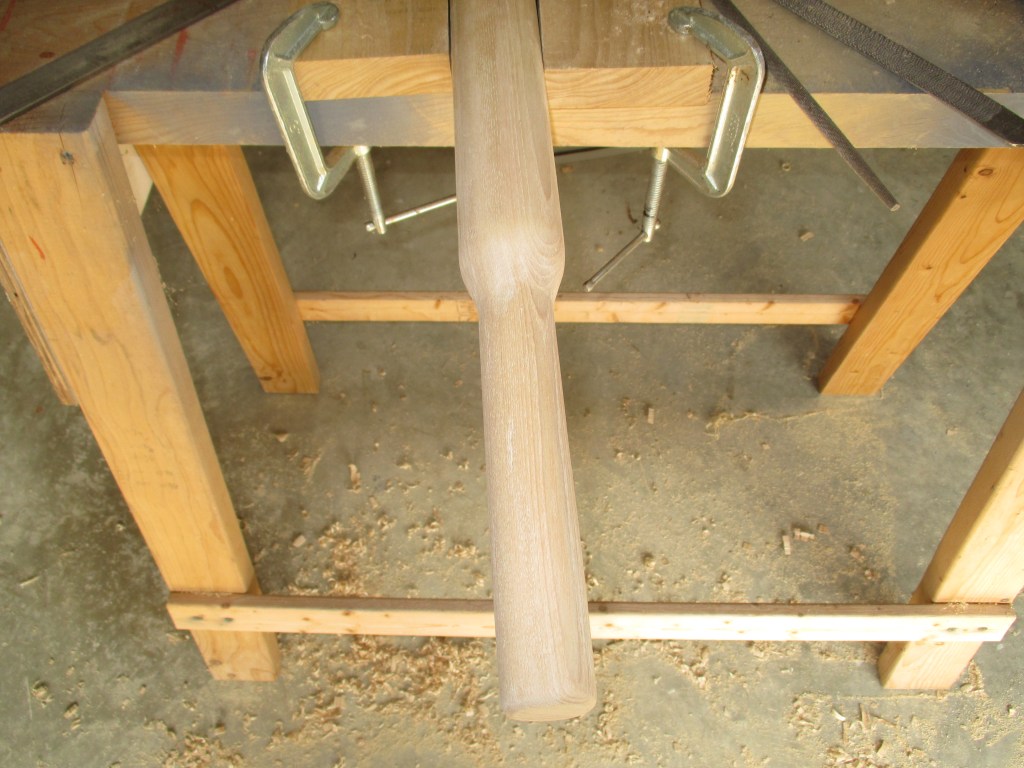
Even though the sculling oar has a narrow operational window (little to no adverse current and wind under say 6 kts) I can scull the 18,000lb Far Reach at 1.5 kts without too much effort. I have sculled the boat for over an hour at a time and was not particularly fatigued. Done correctly sculling relies not on arm strength but on employing your body weight leveraging a proper length oar ( ours is 14’8″ long)determined by the height of the pivot point above the waterline (about 42″ on the FR) and angling the blade correctly to propel the boat forward. But, for the sculling oar to work well it has to be designed and supported in an integrated holistic manner.
Sculling is not just waving the blade back and forth through the water. You are presenting the blade to the water at a specific angle throughout the stroke creating a low pressure area on the forward face–similar to the way an airplane wing creates lift. It’s the low pressure area that drives the oar forward which, because it’s connected to the boat, pushes the boat forward.

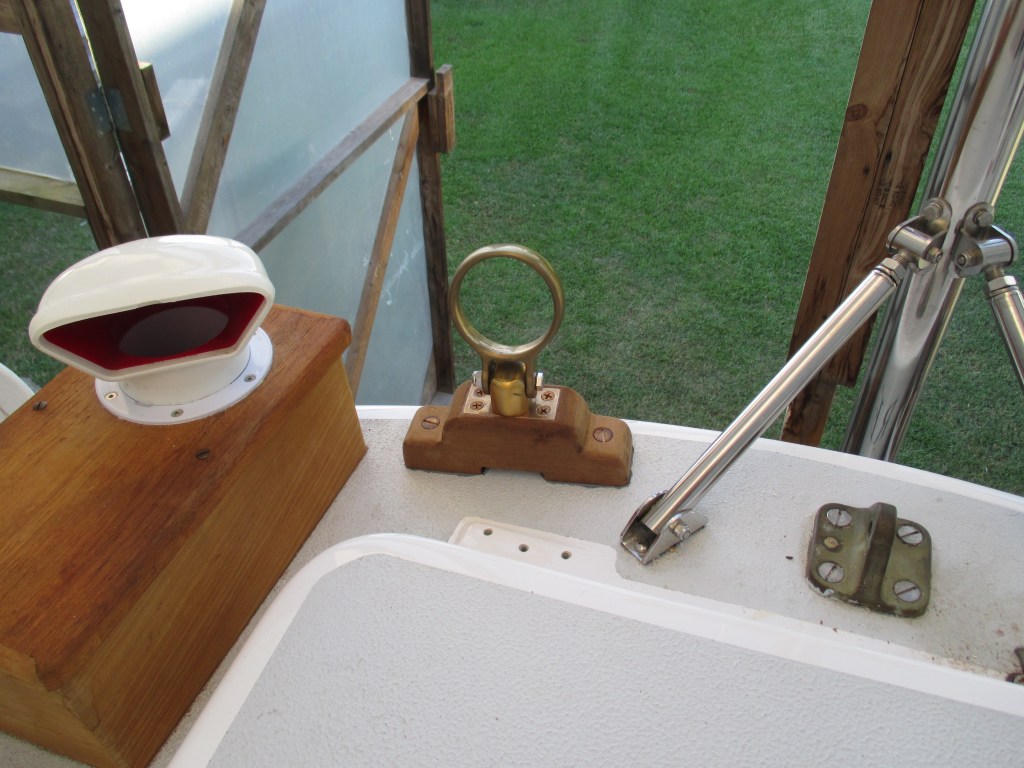
There is tremendous pressure exerted on the oar which forces the the handle into the air when you are sculling a big heavy displacement boat. Ah-ha! you say. That has to take a lot of strength to hold the handle down. And you would be correct except there is a critical component to the sculling oar system—the “oriental lanyard.” The lanyard is attached to an eyebolt in the oar loom just back of the handle and is connected downward to a carefully positioned padeye on the deck. It has two purposes. First, when tensioned properly, the lanyard prevents the handle from rising up so you don’t have to exert energy trying to hold it down. Second, it induces the critical twist to the oar blade at the end of each stroke to present the essential angle of blade to water to create the low pressure area that I described earlier and is depicted above.
With the right length oar, a strong pivot point with minimal friction, and the oriental lanyard I can sprint the boat to 2 kts but that takes strenuous effort which I can’t sustain for long. With the oar over the stern I can turn the boat 360 degrees within her own length. I have read that an expert can scull a boat backward. I have never attempted it but it is on my list of things to try out. I would also say I am not an expert. I am modestly proficient.
Though it’s only a short clip, below is a YouTube video of me sculling the Far Reach the morning we departed the marina to pre-stage the boat at Beaufort NC last November 2018. From Beaufort, I singlehanded the Far Reach to the Virgin Islands.
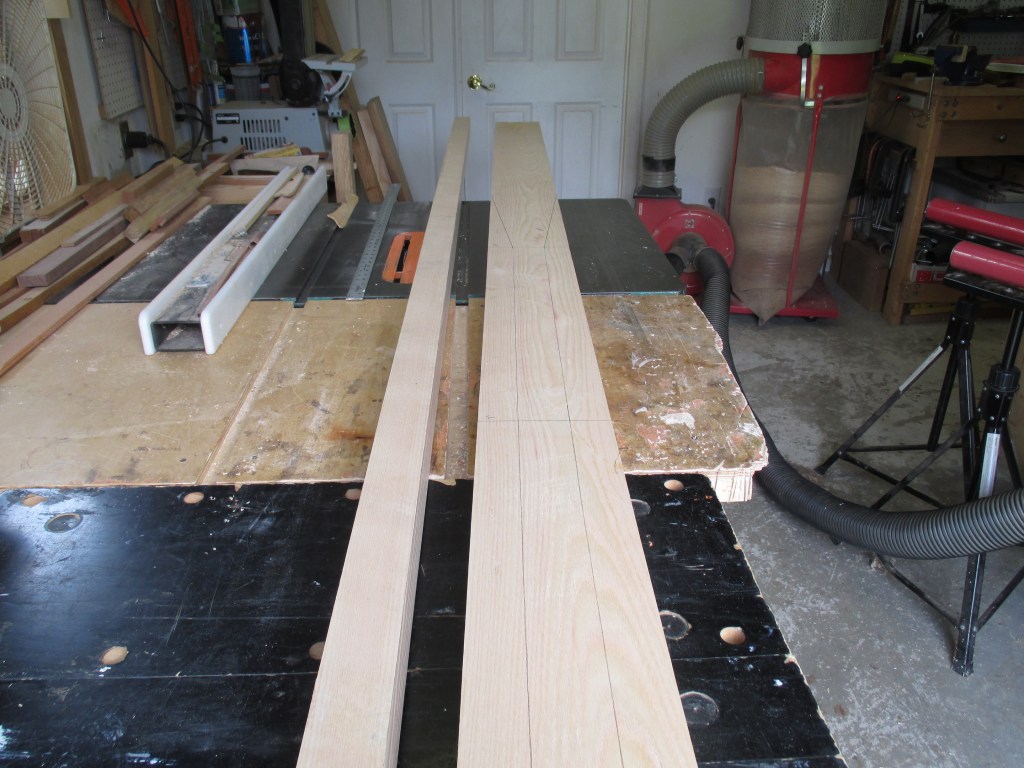
The oar was not difficult to make. You can read the details about building the oar here. It took a few hours a day for a couple of days. Maybe a total of 10-12 hours. I built the oar from 10/4 ash using a jig saw, draw knife, spoke shave, hand power planer, and a block and smoothing plane. I originally made it 16′ long as I was not sure of the correct length until I had the oar in hand and had a chance to use it. Ultimately it ended up at 14′ 10″. Because I did not have a piece of ash 16′ long. I scarfed the wood together using a 12:1 scarf. I sent some pictures to Larry Pardey asking if he would offer a critique. He liked the oar but had concerns about the strength of a 12:1 scarf being able to hold up against the tremendous loads that would be imposed on it. He suggested I reinforce the scarf joint with fiberglass cloth and epoxy. Instead of fiberglass I sleeved the lower half of the loom, over the scarf, with two layers of a carbon fiber “sock” and epoxy.
I would be remiss if I did not mention Lin and Larry Pardey’s significant contribution to the use of sculling oars to move heavy displacement sailboats. I highly recommend their superb chapter called “Oar Power” in their classic book Self Sufficient Sailor detailing the design, building, and use of a sculling oar. Lin informed me the newly revised 3rd edition of SSS has just shipped from the publisher and will soon be available to the public. While some old material was dropped the chapter on “Oar Power” was retained and includes some new info on sculling oars. I have seen the new edition and it is fantastic. My 2nd edition is dog eared and full of margin notes. It played a significant role in helping me to keep the Far Reach a simple yet elegant sailing machine.

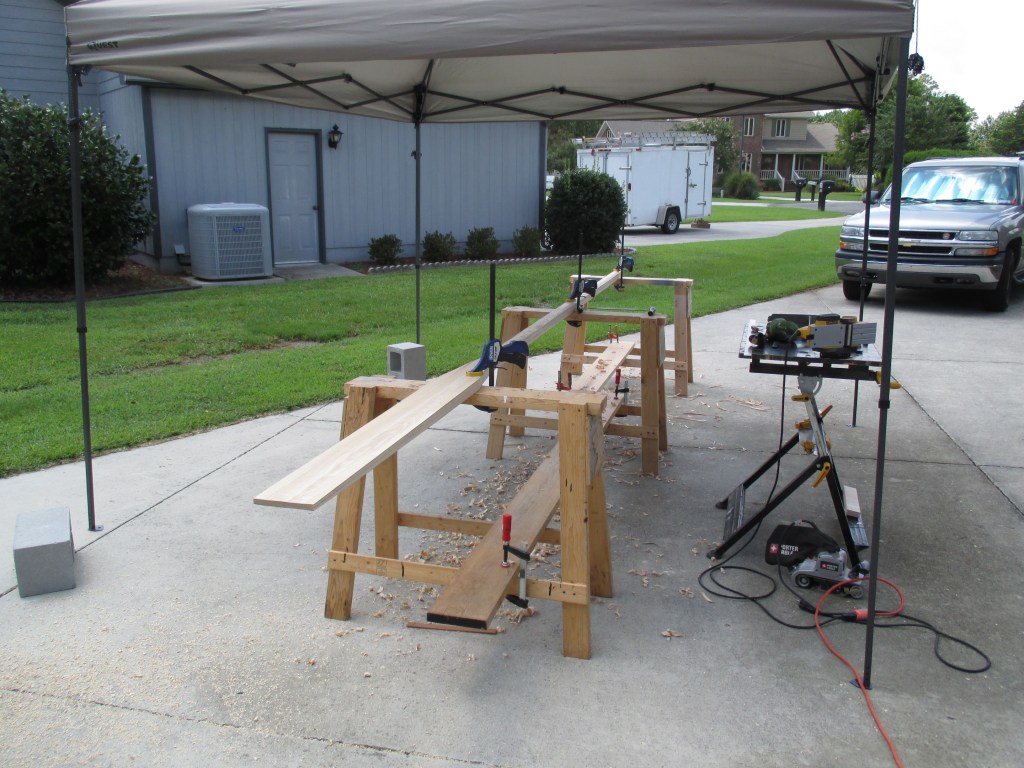


The next critical component of the sculling oar is the oarlock and support base. I was able to get access to the pattern made by Larry Pardey that he used to make the oarlock for Taleisin. I had mine cast at Mystic River Foundry. A local machine shop milled the pintel from an off-cut silicon bronze propeller shaft. I found an oversize bronze oarlock socket on line for about $25. I made the first base from teak. Though it never failed I did not like the design and replaced it two years later with a much better bullet-proof design I am very happy with. Once I had the oar in hand I had to determine where on the boat was the best place to scull, meaning where I would stand. The best place was on the aft end of the cockpit on top of the propane locker. That gave me the proper angle of the oar (about 40 degrees to the water’s surface). It also gave me access to the tiller so I could scull and use the tiller if necessary. With the oarlock made, and the oarlock support base in place I was able to make a good guess on how long the oar should be. So I initially cut it to about 15′ in length and shaped a proper handle. Over time I shortened the oar another 4″ which, four years later, still seems about right.

Sculling is not for everyone. The conditions required for successfully sculling a heavy displacement boat are, as previously mentioned, narrow. It is not a great solution for a marina bound boat and works better if you keep your boat on a mooring. But if built and installed correctly it is effective. It’s also very rewarding to be able to move your boat in such a timeless manner and be free of all the complexities associated with an internal combustion engine.
A Sculling oar cannot replace the capabilities of an inboard engine…not even close. But, if your needs are limited, if you are a competent sailor, if you are extraordinarily patient, if the idea of using such a simple historic method to move your boat makes your pulse quicken, then it might be right for you.

Hello and thank you for taking the time to document your journey. People like myself can benefit so much from the tremendous amount of free info tips and advices. Thanks again. My today’s interest is about your sculling oar. I have a sailboat of your size with no inboard engine. At the moment, i have no interest in installing one (although your option for an outboard seems suitable but that will be left for later). All I am planning to do is cruising on the potomac river and i mean cruising…Between the sails and the oar, I think ot should be enough for me to achieve that and also be able to get in and out the pier.
So I have looked at the way you built your oar. O am fortunate enough to jave a 18′ piece of wood with a thickness of 2″. I do not see in your details page any mention of the thickness required (unless i missed it). Could you give me that information. Also, would it be possible to get a rough drawing of your oar with precise dimensions (for example how long is the base part, how large?). I will be building it myself and that will help a lot. I am grateful for all your work. Be well. Sora
LikeLike
Hi, glad you found the info useful. To answer your questions:
Oar length is a function of achieving the best angle of oar to the surface of the water. About 40° generally. You have to figure out where you will stand to scull. I stand on the aft cockpit seat locker just forward if the lazarette hatch. You have to figure out where the oar lock will be positioned and it’s height above the water. The effectiveness of sculling a heavy boat depends on the all the factors as a wholistic system. Your experience, the boat displacement, transom height above water, oarlock design, oar length, blade length, position of oriental lanyard, etc. The most complete info for using a western style oars to scull a displacement boat is found in Self Sufficient Sailor by the Pardeys. I have info on my other website http://www.farreachvoyages.com. Look under the project tabs for sculling oar.
My oar is 14’10” long. The blade is 4’8″ from the tip to end of flare at the loom. The loom is 2.25″ in diameter and about 2.35″ including the leather. 2.5″ would be better. The oarlock ID is about 2.8″.
The scantlings of the oar depend on several factors–the displacement of your boat and the length of the oar. My oar bends a bit when I scull, especially getting started from dead stop. It should bend a little but not much.
That should get you started.
LikeLike
Thank you so much for your detailed response. I am right now in the process of making my oar and will send pics of finished product. Finger crossed…
By the way, I am enjoying making it myself.
LikeLike
Excellent. It’s very rewarding to use something you built yourself. Take your time. Do it right and they will perform well and last a long time.
LikeLike