

Singlehanding home from Sint Maarten to N.C. in May 2016. The lifelines felt too low and I wanted to replace them.
During the six year rebuild of the Far Reach I wanted to replace the original 24” tall lifeline stanchions with taller ones of about 30 inches. But, at that time, taller stanchions were not enough of a priority to make it on to the budget. We made do for the past three years including 3,500nm of off-shore sailing.
The problem with 24” tall stanchions is they are about the same height as the back of the knee…so they can encourage a fall backward over them if you are caught off-guard. Also, there are times when you simply have to go to the leeward side of the boat. When the Far Reach is heeling those 24” lifelines are even lower relative to your body. Sailing offshore to and from the eastern Caribbean made it very clear to me that I wanted to replace the stanchions with a taller more robust stanchion at some point.

Those are the original 24” tall SS stanchions. Of course the Far Reach is not in her original configuration after the six year rebuild. She now has 6.5” tall bulwarks and is without the original stern or bow pulpit.
I had my eye on Garhauer stainless steel stanchions for a while. They are a good value. But, I have mostly moved away from SS which often seems to rust and generally cries out for attention.
This past summer while splicing the rigging on Kaj Jakobsen’s 34’ Falmouth Cutter, Astrid, I was smitten with the beautiful stanchions he has on his boat. Very nice, and strong too. He got them from Port Townsend Foundry. When I got home, I called Pete Langley and discussed it with him. The drawn brass tubes are actually less expensive than the Garhauer SS stanchions, even though the side walls are double the thickness. But, the Garhauer stanchions have the eye for the lifeline incorporated in them and the brass ones from PTF do not. The eye fitting is an extra expense and actually cost more than the brass tube itself. The fittings are custom cast and are solid bronze. But, even so, the brass tubes and top fittings were only several hundred dollars more than the Garhauer tubes. I ordered them in the middle of October. It took about two weeks for them to arrive…and that includes the casting of the fittings. PTF really came through. Like everything they make, the fittings were perfect. Just beautiful work.
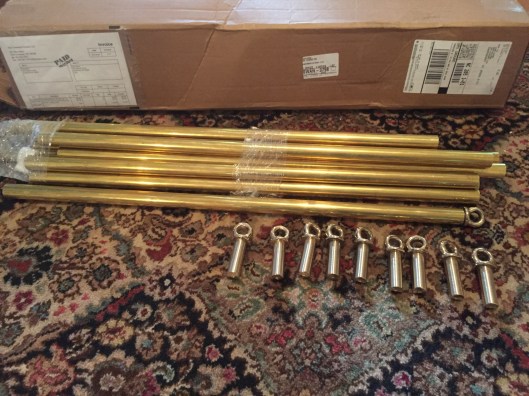
Ten brass stanchion tubes and solid bronze end fittings.
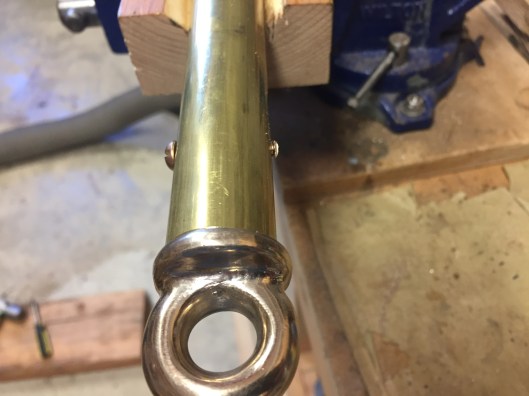
The tube OD is the same 1” as the original SS tubes. My task was to install the top fittings into the tubes. To do it, I made a jig for my benchtop drill press so I could drill the holes in each tube and end fitting as precisely and as quickly as possible. Basically, I installed the fitting in the tube, put the tube in the jig, drilled through one side of the tube and eye fitting with a 3/16” bit. Then, I switched to a smaller 5/32” bit and drilled through the same hole but on out the opposite side wall. I tapped the smaller hole in the sidewall with a 10×24 tap. I installed a silicon bronze 10-24 x 1.5” round head machine screw.

I cobbled together some scrap plywood and built a jig on the benchtop drill press platform. The jig allowed me to work quickly and replicate drilling holes in the same place on each of the ten stanchions.
Next, I sawed off the end of the fastener leaving about 1/16” proud.
I used a hacksaw to cut off all but about 1/16” of threads.
Then, I used the round head of a ball-peen hammer to flair the proud end into a mushroom shape.
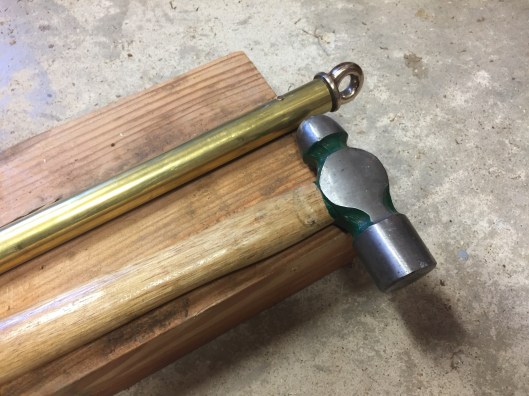
I think a lot of poeple these days have never used a ball peen hammer or even know what it’s used for.
Next, I used the flat side of the hammer to flatted the edges.

The trick and the skill is to hammer the fastener as few times as possible or it becomes likely you will crack the end of the fastener. Less is more.
Finally, I filed any rough edges and left them ever so slightly rounded.
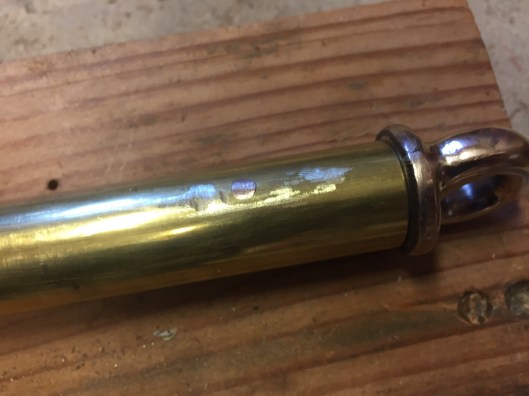
After I peened the fastener, I filed it gently. I removed the file marks later with a highspeed buffing wheel but the reality is the stanchion will quickly change color to a beautiful burnished brown which will render machining marks like these invisible.
Next day, Gayle and I went to the boat to install the stanchions. We took the drill press and the generator (Hancock Marina still has no power even though Hurricane Florence was two months ago). We removed the life-lines and then the original SS stanchion tubes. We installed the tubes and I used a sharpie to make a mark on the tube via a small hole in the stanchion base where a small 10-24 RH bronze machine screw is threaded through the base and into the stanchion tube. With the hole marked, we removed the tube and drilled and tapped the hole then reinstalled the tubes in the bases. I then reeved the lifelines through the top fittings on the stanchions.
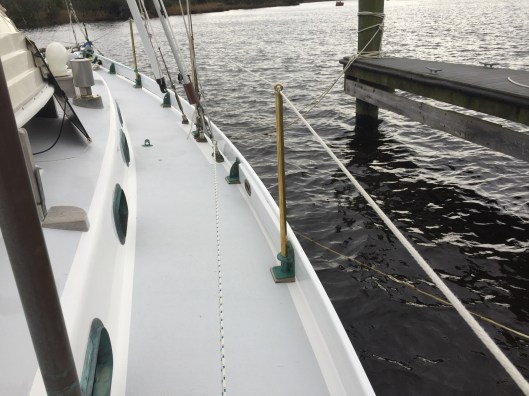
I think the stanchions turned out great. They are 30” tall. The beautiful bronze top fitting is smooth and rounded so there is no need for chafing leather on the dyneema lifeline where it passes through the fittings. Best of all this turned out to be a quick and easy project.
They are definitely taller—six inches taller to be exact. Much better. I don’t think it will take long for the stanchions to turn a nice burnished brown. They are the same metal as the gallows stanchions which you can see in the photos.
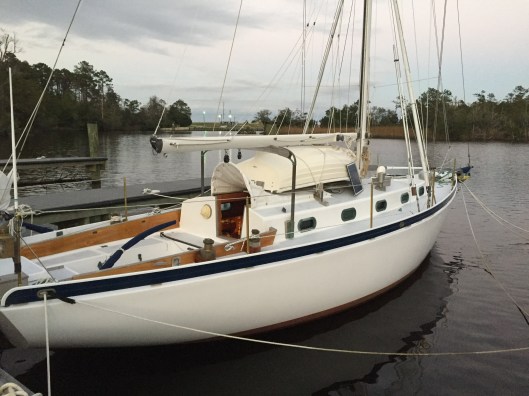
The Far Reach with her new stronger and taller stanchions and lifelines.
