
We never had problems with bugs in the West Indies as we always anchored out and there was always a breeze. Nonetheless, I wanted to have a full set of screens for the Far Reach.
With Hurricane Florence behind us, it was time to return to the preparation of the Far Reach for the voyage back to the BVI and the West Indies. At the moment we are working on a few small but important projects. Described below are a few of them.
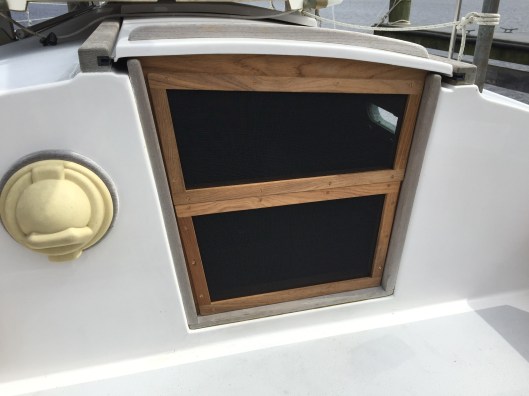
We completed building the drop-in companionway bug screens. I built the teak frames last winter but got side tracked before installing the screens. I still need to sew up some screens for the foredeck and saloon deck hatches. Gayle sewed a nice padded pouch to protect them when stored under a bunk.
I am a big fan of having an easily deployed whisker pole for downwind sailing. While I like the Pardey style continuous system we use, the old style inboard jaw fitting could sometimes bind on the mast ring. I discussed the problem with Randy Risvold in the Forespar tech section. A new high-tech pole with an advanced toggle fitting would cost about $3000. A new pole was not in my budget. I wanted to figure out how to make the pole i have work better. Randy recommended a new style SS fitting that incorporates a special toggle car and male fitting that couples with a composite fitting. Randy had one that fits my 40 year old telescopic pole! It was not cheap but I had been saving for it. It married perfectly with our pole and was easy to install.
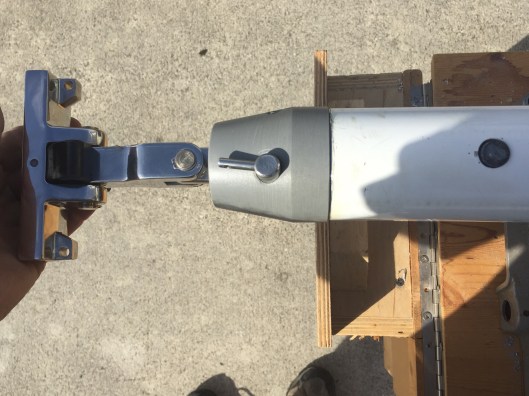
The new Forespar mastcar with toggle and composite pole fitting is a big improvement to our 40 year old whisker pole.
I removed the bronze ABI manual windlass from the Far Reach to disassemble, clean, grease, reassemble, and reinstall. It was a fairly easy project. I also wanted to clean off the black staining on the brass housing. It would not come off without standing. I used a power polisher with a sisel wheel to remove the sanding marks. It will regain its patina quickly enough I think. After I reinstalled the windlass I decided to make a new windlass handle and used a 30” long, 1/4” thick, 1 1/2” wide silicon bronze plate. I milled some scrap teak and crafted a nice handle. I attached the handles with #10-24 bronze machine screws tapped into the bronze plate. Much better looking than the original SS tube handle and it won’t rust.
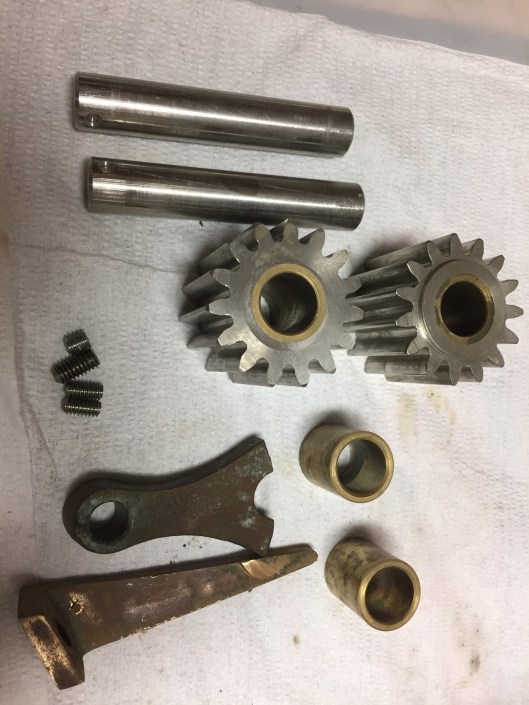
The windlass is easy to take apart. There is not much to go wrong if you take care of it.

I had to sand off the black stains on the housing which meant I had to polish out the sanding marks. The shiny brass will turn to a beautiful blue green patina this winter.
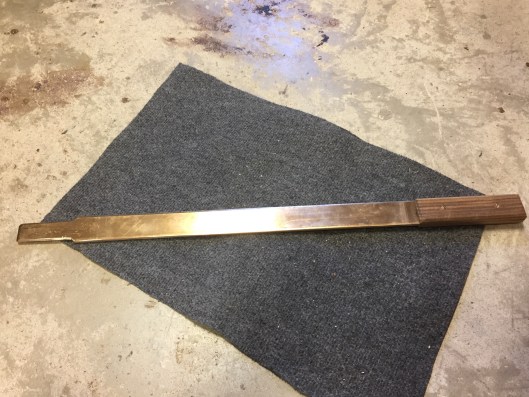
The new windlass handle.
Then, I rebuilt the second ABI windlass I picked up two years ago. It was being used as a door stop in a boat yard and I got it for a good price. I rebuilt it and sold it in a week. I used the money I made from the sale to purchase drawn brass stanchions and bronze life-line fittings from Port Townsend Foundry. They will be 6” taller than the 24” stock stanchions we use now and they have a thicker stronger side wall. The 24” stanchions are too low for offshore work. PTF tells me I will have them in time to install them. I’m not so sure.
Next, I needed to replace the oar lock socket pad I made during the rebuild of the Far Reach. The oar lock socket pad supports our 14’10” sculling oar. It actually worked well but it positioned the oar lock higher and further forward than I wanted. The problem is the large dimension end-grain teak pad was starting to develop endgrain checking. I enjoy sculling the boat so I wanted to improve the design. After building several mock ups and trying them out on the boat I settled on a design that could be built with stuff I had on hand—1/4” silicon bronze and iroko. The design also used the existing holes for the old pad and all the bolts, etc. I painted the iroko white to match the bulwarks and topside paint. The bronze will eventually turn blue green and should look great.

The oar lock pad as originally installed. But, there was too much exposed end grain which was starting to check significantly. Sculling puts tremendous strain on the pad and I thought it might crack.

The new oar lock pad is much stronger with a solid silicon brass top plate. The wood is Iroko. The holes line up perfectly with the original holes. I added the curves to make it visually more appealing than an uninspired boxy pad.

The underside of the pad.

I painted the iroko white. The bolts fit perfectly with the original holes. I bedded it with butyl rubber . Im looking forward to using it when I next scull the Far Reach.
We washed the boat and also applied another coat of Awlcare polymer coating. We installed few walnut wood plugs on some forward cabin trim I had never finished—hey, back in 2015 it was install wood plugs or sail to the west Indies. We still have a few things to do but in early November I plan to start provisioning the boat and moving gear, tools, and equipment back aboard in preparation for a late November departure.
