
The “scratch and patch” repair technique I used to repair the small damaged area on both winch bases worked very well. I can’t tell where the repair was made on the port base. Though it still required five repair coats and two full coats over the entire base it still saved a bunch of work.
For the last couple weeks we have been working on several projects as we continue to either further refine the Far Reach’s few systems or conduct routine maintenance. One project was the installation of a camcleat for the jib downhaul System, which is a separate article.
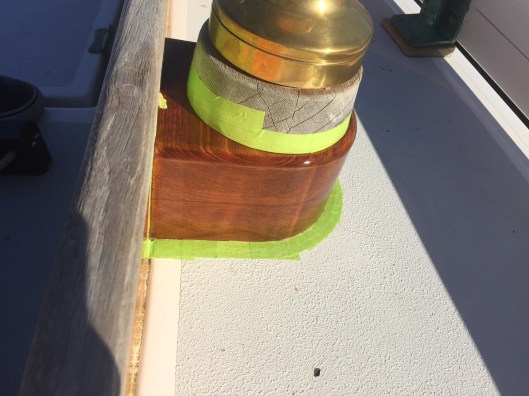
The first varnish project was to repair some damaged varnish on the teak stays’l winch bases. The bases are about 4” tall and are varnished. On top of the base is a 2” thick bare teak pad that serves to raise the winch up enough so the drum is above the top of the coaming. Though we varnish the coamings and pads every four months, there was a break in the varnish on the top edge of each pad. Horizontal surfaces always receive more abuse than vertical surfaces so this damage was not a big surprise.
The task was to try to avoid the usual remedy of stripping all the varnish off, taking the teak back to bare wood, and starting over. I read about a technique Rebecca Whitman calls “scratch and patch” in her excellent books “Brightwork.” I decided to try it. The technique focuses the repair only on the damaged area. It appears to have worked very well. I can’t tell where the patch is located. This project was a race against time as the cold weather is upon us. We will try the same technique in the spring on a few rub spots on the coamings.
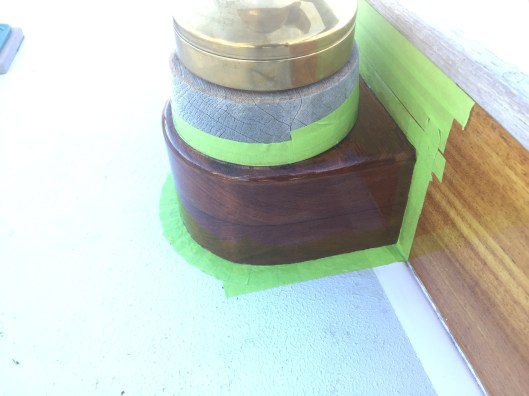
Starboard side winch base and another varnish repair that is near invisible.
The next varnish project, which is on-going. It’s another scratch and patch varnish repair that I should have done at the same time as the varnish repair to the winch bases. However, because the bowsprit has a cover, I did not see it until two days ago. The very tip of the bowsprit was damaged—more like rubbed—when it made contact with the head of the dock.

Scratch and patch still requires a coat a day to the repair area. The final two coats will be applied to the entire tip from the repair area to the kranze iron. But it means I don’t have to use a heat gun and strip all the varnish back to bare wood. Not such a big thing when working on a project as small as the tip of the bowsprit but a big help when making repairs to dings and rubs on the coamings. Here I am applying the third coat to the tip of the sprit.
I am more than capable of pronging the sprit into the dock all on my own. It is challenging getting the 17,000 lb FR safely into her slip in a cross-current aided only by a 9.9 HP outboard, but that’s not what happened. A passing skiff that failed to slow down in the no-wake zone around the marina caused the FR to lurch forward while we were repositioning her in the slip and the bowsprit made contact with the dock. The bowsprit canvas cover meant I did not see the damage at the time. It’s disappointing, maybe aggravating is a better word, that skiff and other powerboat owners so blithely create wakes around marinas seemingly without thought to the hazards and damage they can create. Working along side the FR on a work-raft I have had wakes wash over my feet, over turn paint cans, splash saltwater over tools etc etc. And while I have educated a few that I could confront, usually they are long gone. The law may say they are responsible for their wakes but it’s a lost cause trying to slow them down in most cases.
In the mean time, I am applying the same “scratch and patch” technique to the bowsprit that I used on the winch base and hope to have it fully repaired in a week or so.

Looks good! You must have an awesome helper…😉
Sent from my iPad
>
LikeLike